Seller Blog
Advice, help and support for ASOS Marketplace sellers.
Top tips for shooting indoors

With this in mind here are our top tips for shooting indoors, with Marketplace photography rules in mind and a view to increasing your editorial oomph. Remember all boutique product must be shot on a model, in natural light and in a “real” location – happy snapping!
KEEPIN’ IT REAL
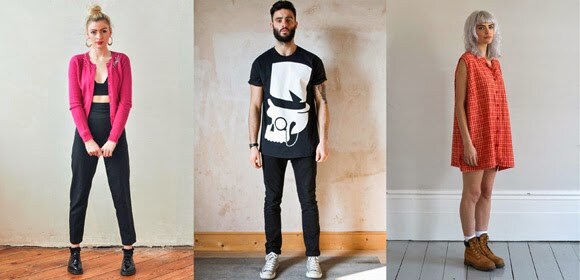
We’re all about celebrating our boutique’s “real photography” - we love your imagery and it’s what sets us apart visually as a platform. One of the fundamental Marketplace rules on photography is that all images must be shot in a “real location” – meaning whether indoors or outdoors your images must be not be shot against a studio backdrop or with strong artificial lighting.
If you choose to shoot in front of a white wall then do so with caution – if your imagery gives the suggestion of studio photography then you will not be featured in and around the site and you could even have your images suspended by our eagle-eyed fashion police.
To ensure your images are 100% within Marketplace guidelines make sure you go for one or more of the following suggestions:

Use props
Including a prop in your imagery can be a good way to show the credentials of your “real location”. This can also work towards being an instrumental tool in your branding, making your images recognisable if used elsewhere on site.
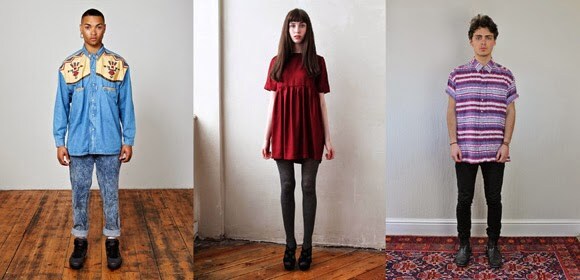
Include a full length shot as your main image
Making sure the floor is visible will make it clear your product hasn’t been shot in front of a studio backdrop. Be careful if your flooring is white; we recommend using a contrasting/complementing coloured floor where possible to give a clear definition.

Add a little interest
Select a background with a textured or coloured wall - this will draw attention to your imagery and could be another building block in your branding. And please, even if that wall isn’t pristine white dust sheets are never an acceptable backdrop, we don’t want to ever want to see your crumpled duvet cover.

Showcase your real location
Another option is to show any fixtures of fittings of your location in your images, a sure fire way to be keepin’ it “real” with your location.
SEEING THE LIGHT
We can’t stress enough the importance of finding an area with lots (and lots) of lovely natural light. Try and work with your source of natural light to the front or diagonally in front of the model, lighting from the side can cause shadows which may look super arty but will obscure your product.
FLASH DANCE
We don’t allow harsh studio lighting but we understand that a little artificial light may occasionally be needed to brighten colours and fill in shadows. However, any lighting must be soft, nearly natural and sympathetic to our rules on photography. We know our stuff and if we spy any sharp shadows or bleached out backdrops then our fashion police will be onto you.
BRIGHTENING WITHOUT LIGHTING
Still struggling with those shadows but wanting to keep au naturel? Try bouncing any available natural light back onto the model with a photographer’s reflector. These are super cheap to buy but a big white board will do the same job if needs be.
KEEP IT SIMPLE BUT THINK OUTSIDE THE BOX
Don’t get carried away with elaborate or busy backgrounds and always be sure your model, and more importantly your product is what grabs the customer first.
We’d always encourage you to get scouting for interesting locations, whether it’s a gritty warehouse for an urban brand or a pastel hued space for some whimsical vintage. When shooting indoors a plain white wall might be the easy option but it won’t always get you noticed.